
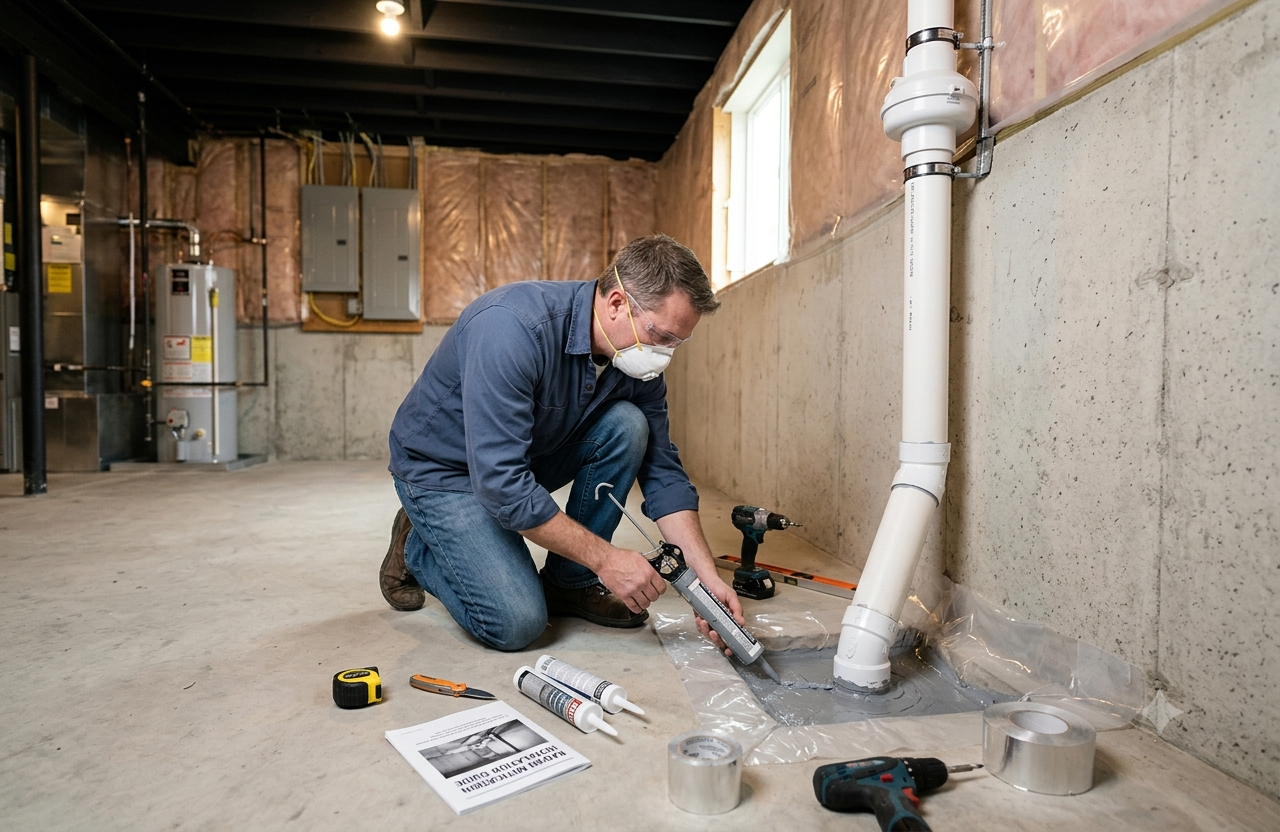
Radon is a naturally occurring radioactive gas that can enter homes through cracks in foundations, floors, walls, sump pits, and other openings. Because it is invisible, odorless, and tasteless, homeowners cannot detect high radon levels without proper testing. Long-term exposure to elevated radon concentrations can create serious health concerns, which makes controlling radon an important part of maintaining a healthy indoor environment.
When homeowners discover elevated radon levels, they may consider a DIY radon removal service as a way to reduce costs. Online guides and home improvement resources can make radon mitigation appear relatively simple. However, an effective radon reduction system requires careful planning, proper equipment, and accurate testing.
Understanding how DIY radon reduction works, its potential limitations, and when professional assistance is appropriate can help homeowners make a safer and more informed decision.
What Is a DIY Radon Removal Service
A DIY radon removal service generally refers to homeowners attempting to reduce radon levels themselves rather than hiring a qualified radon mitigation professional. The process usually involves installing a system designed to collect radon from beneath the building and safely exhaust it outdoors.
The most common approach is sub-slab depressurization. A pipe is installed through the foundation or connected to an existing opening, allowing a fan to draw radon-containing soil gas from beneath the home. The gas is then directed outside through a vent pipe.
Although the basic principle may sound straightforward, successful radon mitigation depends on factors such as the home's foundation design, soil characteristics, air pressure, existing ventilation, and the location of the exhaust point.
Why Should You Test for Radon Before Removing It
Testing should be the first step before attempting any radon reduction project. A homeowner needs to know whether radon levels are elevated and, if possible, where the gas is entering the building.
Radon testing can be performed using short-term or long-term test devices. Short-term testing can provide relatively quick results, while long-term testing gives a better picture of average exposure over an extended period.
Testing before mitigation establishes a baseline. After a mitigation system is installed, another test should be performed to determine whether the system has actually reduced radon levels.
Without testing before and after the project, homeowners may have no reliable way to determine whether their DIY efforts have worked.
How Does a DIY Radon Reduction System Work
A typical radon mitigation system works by creating negative pressure beneath the building. This helps prevent radon-containing soil gas from entering living areas.
A basic system may include:
- A suction point beneath or through the foundation
- PVC or another suitable vent pipe
- A radon mitigation fan
- Sealed foundation openings
- An outdoor exhaust point
- Monitoring or diagnostic equipment where appropriate
The fan continuously pulls soil gas from beneath the structure and releases it outside.
However, simply installing a fan and pipe does not guarantee effective mitigation. The system must be designed so that it creates appropriate suction beneath the building while avoiding problems such as backdrafting combustion appliances or exhausting radon into an unsafe location.
What Are the Potential Benefits of DIY Radon Removal
One of the biggest reasons homeowners consider a DIY radon removal service is cost. Doing the work independently can potentially reduce labor expenses.
DIY work can also give homeowners greater control over the project. People who have experience with plumbing, electrical work, ventilation systems, or home renovations may feel comfortable handling certain parts of a mitigation installation.
Another potential benefit is flexibility. A homeowner can research the property, identify possible entry points, seal suitable openings, and monitor radon levels over time.
However, these advantages should be balanced against the risks of an incorrectly designed or installed system.
What Are the Risks of DIY Radon Mitigation
Radon mitigation is more than simply installing a ventilation pipe. An improperly installed system may fail to reduce radon levels or could create additional indoor air-quality problems.
One concern is combustion safety. Depressurizing parts of a building can potentially affect naturally vented furnaces, fireplaces, water heaters, or other combustion appliances. If combustion gases are pulled into the home, occupants could be exposed to dangerous pollutants.
Another concern is exhaust placement. Radon must be discharged outdoors in a location where it is unlikely to re-enter the home or nearby buildings.
Electrical work is another consideration. A mitigation fan may require electrical connections that should be completed according to applicable safety requirements.
There is also the possibility of damaging the foundation or creating unnecessary openings if drilling and sealing are performed incorrectly.
For these reasons, homeowners should carefully evaluate their skills and the complexity of their property before attempting a complete DIY installation.
Can Sealing Cracks Remove Radon
Sealing cracks and openings can be an important part of radon reduction, but sealing alone is generally not considered a complete solution for elevated radon levels.
Radon can enter through numerous pathways, including:
- Foundation cracks
- Construction joints
- Floor drains
- Sump pits
- Gaps around pipes
- Crawl spaces
- Gaps between walls and floors
Sealing visible openings can reduce some soil-gas entry, but pressure differences beneath a home can continue to draw radon through other pathways.
For homes with elevated radon concentrations, sealing is often used together with an active mitigation system rather than as the only method of control.
When Should You Choose Professional Radon Mitigation
Professional assistance may be the better option when radon levels are significantly elevated, the property has a complicated foundation, or the homeowner is uncertain about ventilation and pressure issues.
A qualified professional can evaluate the structure, identify appropriate suction points, select suitable equipment, and determine an effective exhaust route.
Professional installation can also be particularly valuable when the home contains multiple foundation types, crawl spaces, finished basements, or combustion appliances.
Instead of focusing only on the initial installation cost, homeowners should consider the long-term objective: achieving and maintaining lower radon levels safely.
How Can You Verify That the System Works
Testing after installation is one of the most important parts of radon mitigation.
Once the system has been operating, the home should be retested using an appropriate radon testing method. Results should be compared with the initial baseline to determine whether radon concentrations have decreased.
Homeowners should also inspect the mitigation system periodically. A fan that stops operating, a damaged pipe, or changes to the foundation can affect performance.
Some systems include warning devices or indicators that help homeowners recognize fan problems. Regular monitoring provides an additional layer of protection and helps ensure that the system continues to perform as intended.
DIY or Professional Service Which Is Better
The right choice depends on the property, the radon level, and the homeowner's knowledge and experience.
A homeowner with strong construction skills may be able to handle certain preparation tasks, such as sealing appropriate openings or arranging testing. However, designing and installing a complete mitigation system can involve technical considerations that are easy to overlook.
Professional mitigation may have a higher upfront cost, but it can provide greater confidence that the system has been properly designed and installed.
For complicated homes or significantly elevated radon results, professional evaluation is generally the more prudent approach.
Conclusion
A DIY radon removal service may seem like an affordable way to address elevated radon levels, but effective mitigation requires more than simply installing a pipe and fan. Testing, system design, safe exhaust placement, pressure management, electrical safety, and post-installation verification all play important roles.
Homeowners can take useful steps themselves, including testing for radon, learning where radon may enter, and sealing suitable openings. However, a complete mitigation project may require specialized knowledge, particularly in homes with complex foundations or combustion appliances.
The most important goal is not simply installing a radon reduction system but ensuring that it actually lowers indoor radon levels safely and consistently. When there is uncertainty about the correct approach, consulting a qualified radon mitigation professional can help protect the home's indoor environment and provide greater peace of mind.

 English
 Arabic
 French
 Spanish
 Portuguese
 Deutsch
 Turkish
 Dutch
Dutch
 Italiano
 Russian
 Romaian
 Portuguese (Brazil)